hello and assalamuakum , today i wll give you some tutorial usimg these softwre :
1) picsart
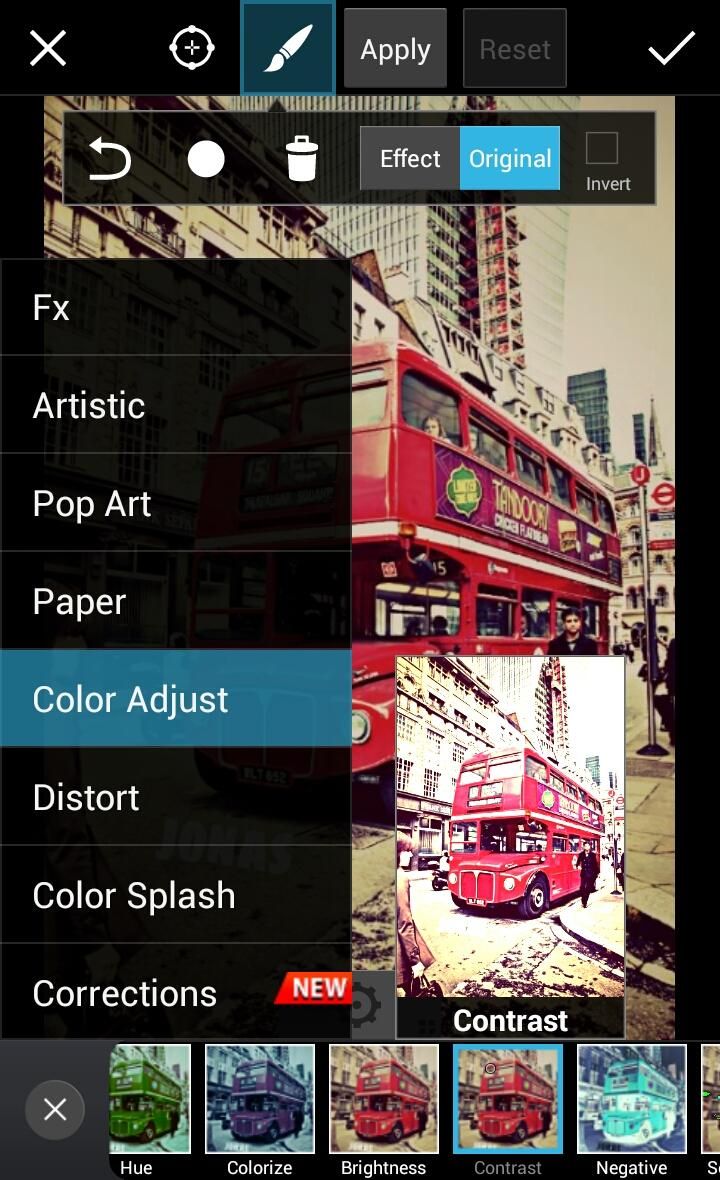
Step 1: Adjust the image contrast.
Open up your chosen image and adjust the contrast to improve the look of the poster effect. Select “Effects” from the toolbar at the bottom of the screen and select “Color Adjust>Contrast”. Adjust the slider until you are happy with the results.
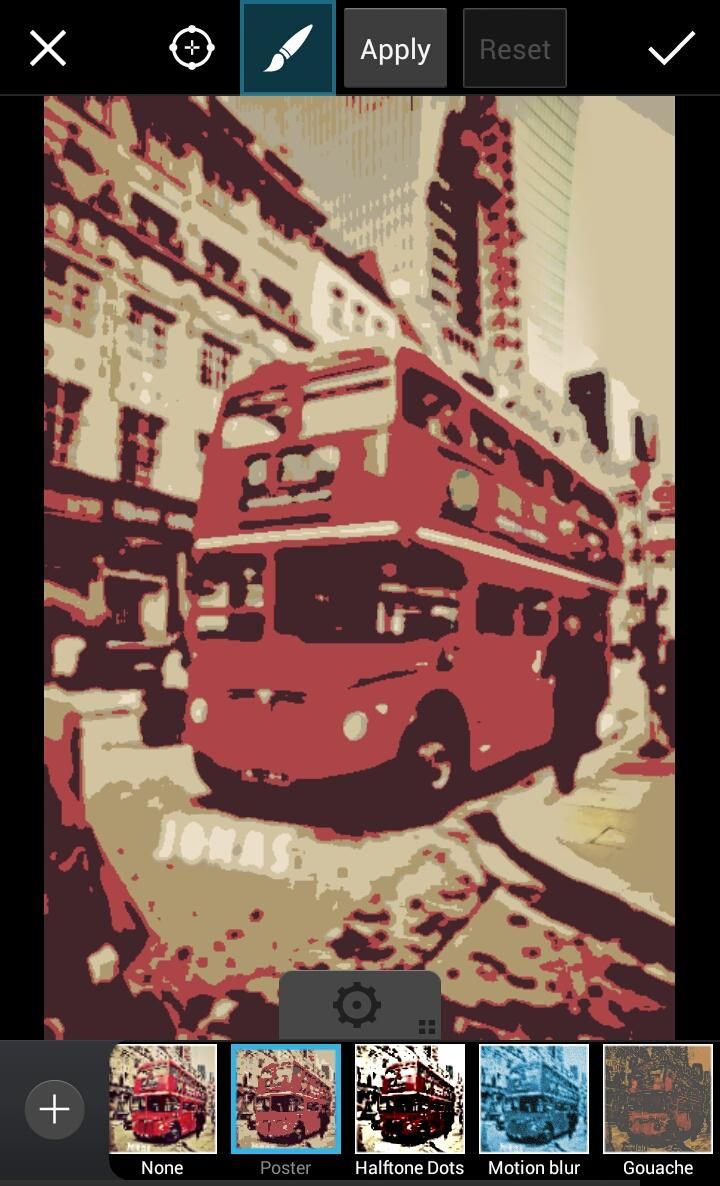
Step 2: Add the poster effect.
Now go to “Effects>Artistic” and select “Poster”.
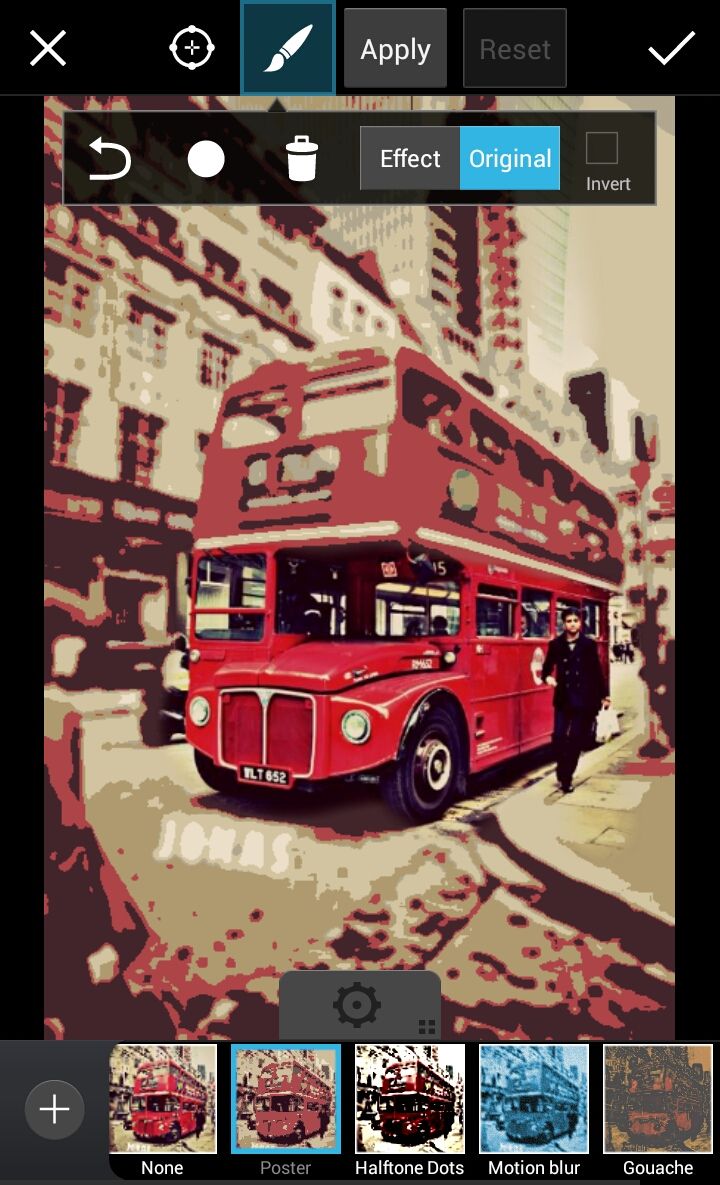
Step 3: Brush out the photo effect.
When you have applied the poster effect, you can then experiment with adjusting the sliders to control how your shot will look. You can also use the brush to scrub out the poster effect in certain areas, creating an image that mixes the effect and your original photo.
photoshop
Step 1: Create the Photoshop Document
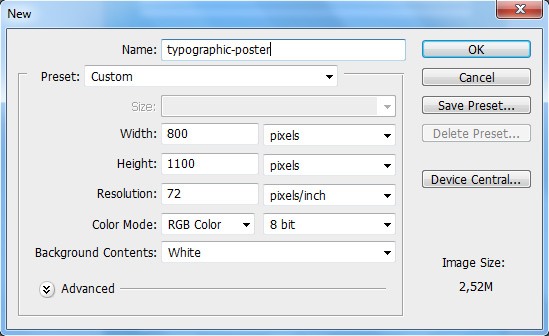
Let’s start by creating a new document. Press Ctrl/Cmd + N and set the document size to 800x1100px with a white background.
Step 2: Create the Blue Gradient Background
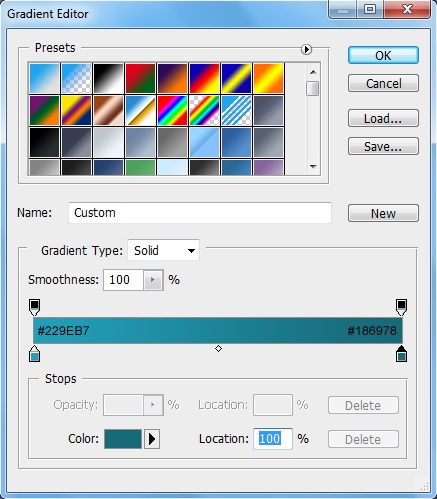
Double-click on the Background layer to unlock it. Choose the Gradient Tool (G) and set the gradient colors to #229EB7 and #186978.
Step 3: Add Texture to the Blue Background
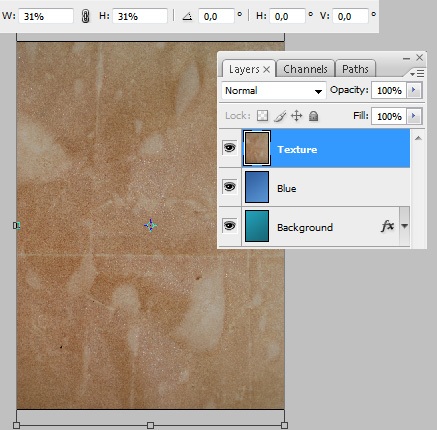
Now go to the High-Resolution Grungy Paper Textures download page on Six Revisions and then download the first texture called Grungy Paper 01. Open it in Photoshop and, using the Move Tool (V), drag it into our main document
Step 4: Adding Photoshop Guides
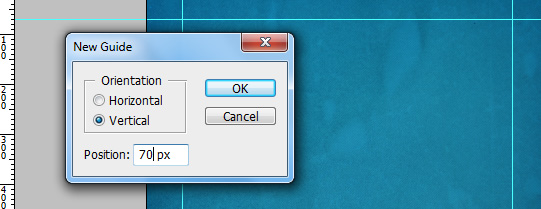
When working with design layouts, and especially those that involve text blocks, Photoshop guides will help you by making it easier to align your design components.
Let’s add 4 guides. To add a guide, you can go to View > New Guide.
Step 5: Add Some Text to the Poster
snapseed
STEP 1 :
Open SnapSeed Application And Select Your Silhouette Picture In SnapSeed
STEP 2 :
First You Have To Select"White Balance" Option
Increase Temperature....
Because It Increases The Sunset Colour..
STEP 3 :
Major Part Is U Have To Know How To Use Tune Image Option...So I Explain..How To Use Tune Image Option...
Select " Tune Image" Option
Select Saturation Option
increase Saturation..This Is Your Choice... Increase The Saturation To Your Need..
Im Increasing My Saturation To 100 Which Is Good For My Silhouette
Im Increasing My Saturation To 100 Which Is Good For My Silhouette
then Select"Shadows" Option..And Reduce Shadow Level.....
So It Reduces The Shadow Level...I Mean Black Colour...
So It Reduces The Shadow Level...I Mean Black Colour...
It's A Too Useful Option To Reduce Shadows...
then Select. " Warmth" Option...And Increase The Level Of Warmth...
So This One Increases The Warmth Colour Like Orange,Red,Sunset Colour...
So This One Increases The Warmth Colour Like Orange,Red,Sunset Colour...
then Select The "Contrast" Option..If It Is Necessary....
Increase Or Reduce...Its Your Choice....
For My Self Im Increasing Contrast To 11
Increase Or Reduce...Its Your Choice....
For My Self Im Increasing Contrast To 11
STEP 4 :
Tap On Selective Option...
And Increase Or Reduce The Colours..
Now Im Reducing The Clouds Black Colour To -12
Tap On Selective Option...
And Increase Or Reduce The Colours..
Now Im Reducing The Clouds Black Colour To -12
So Finally My poster Is Ready .... just fill in the text
so Friends...I Hope This Is A Useful Tutorial For You..
Give Your Valuable Comments In Comment Section
canva
How to make a poster
- step 1
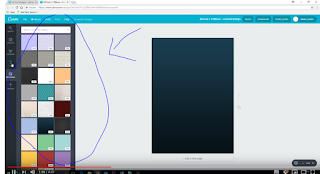
- Get the right size. With Canva, this couldn’t be easier—we have standard poster sizes preset to make it simple.
- step 2
- Choose a poster template, or design your poster from scratch. Canva has thousands of templates to choose from! Select a design that suits the message you’re trying to get across.
- step 3
- Customize your poster. Add your own images or one from our stock library (we have millions to choose from). Change the colors and fonts to suit your needs.
- .
spark adobe
Step 1: Select Your Size
Before you start designing your poster, first you’ll need to choose how big you want your poster to be!. At the bottom on your screen, you’ll see a list of different sizes you can create.Step 2: Select Your Image And Texts
This is probably the most important part of designing your poster.Your images and the words you use on your poster are what will convince people to stop what they’re doing and read!To pick a background image, click “Background” followed by “Replace Photo.Step 3: Share Your Poster
Now that you’ve created the size, texts, and images on your poster, it’s time to put it out there!You can download your poster, print it out and hang it on the walls, or put it on social media




No comments:
Post a Comment